Adjust tack stitch settings
 | Right-click Appliqué > Appliqué to adjust tack stitch settings. |
|---|---|
 | Right-click Appliqué > Appliqué without Holes to adjust tack stitch settings. |
Tacking is used to fix appliqué shapes to a background fabric before cover stitching is applied. You can adjust settings or omit this layer altogether. You can also specify a frame-out movement in order to trim the appliqué patch.
To adjust tack stitch settings...
- Double-click an appliqué object to access object properties.
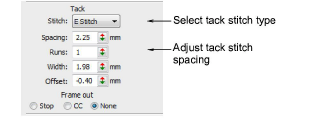
- In the Tack panel, select a tack stitch type from the droplist. Alternatively, select None.
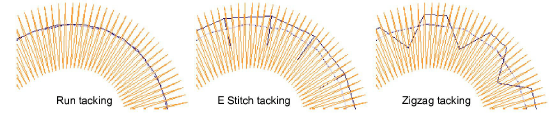
- Adjust tack stitch settings according to selected stitch type:
| Option | Function |
|---|---|
| Length | Stitch length value for Run stitch. |
| Runs | E Stitch only. Number of runs between stitches. |
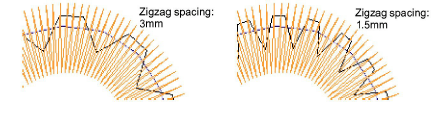
| Spacing | Stitch spacing value for E Stitch and Zigzag. |
| Count | Number of stitch repetitions for Zigzag only. |
| Width | Column width value for Zigzag and E Stitch. |
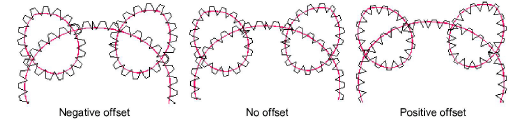
| Offset | Run stitch only. Negative offset value moves the tack stitching within the outline, a positive value moves it outside. |
- Optionally, adjust Offset values. A negative offset moves the tack stitch inwards relative to the guide run. A positive value moves it outwards.
- Optionally, set a Frame Out after the tack stitching in order to trim the appliqué patch. Depending on the machine you are working with – multi-head or single-head – the frame-out command must be specified as a Stop function or Color Change respectively.