Display grids, rulers & guides
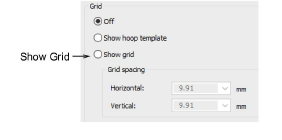
 | Click View > Show Grid to show or hide the grid. Right-click for settings. |
|---|---|
 | Click View > Show Rulers and Guides to show or hide rulers and guides. Right-click for settings. |
 | Drag the ruler zero point to reset a new ruler zero point. |
Use grid lines to help accurately align or size embroidery objects. Default grid spacing is 10mm x 10mm. Invoke rulers to accurately position and scale objects. The unit of measurement – mm or inches – defaults to the regional settings in the MS Windows® Control Panel.
To display grids, rulers and guides...
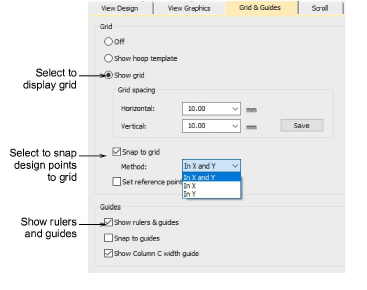
- Click the Show Grid icon or press Shift+G. Right-click for settings. You can change grid spacing, select a reference point and turn Snap to Grid on or off in the Options dialog.
- Click the Show Rulers & Guides icon or press Ctrl+R.
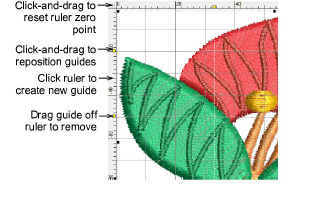
- Reset the ruler zero point by clicking and dragging the button in the top left-hand corner of the ruler.
- To create a guide, click either ruler – horizontal or vertical – and click-and-drag it into position. Multiple guides can be created and just as easily removed.
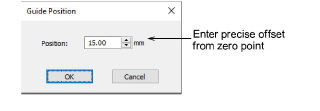
- For more accurate positioning of guides, double-click the yellow handle. In the Guide Position dialog, enter a precise distance from zero point and click OK.
- To remove a guide, drag the yellow guide handle off the design window.
- Optionally, turn on the Snap to... feature via the Options dialog.
- You can also change the color of grid and guidelines via the Background & Display Colors dialog.