Create perspective effects
 | Click Stitch Effects > 3D Warp to apply 3D effects to selected motif fills. Right-click to change settings. |
|---|---|
 | Use Reshape > Reshape Object to reshape selected 3D Warp objects. |
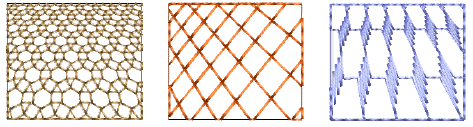
Use Perspective with 3D Warp to create a perspective effect by exaggerating relative sizes.
To create perspective effects...
- Select a motif fill object and right-click the 3D Warp icon. The Object Properties > Curve docker opens.
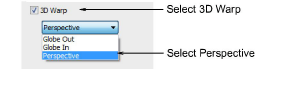
- Select the 3D Warp checkbox, and select Perspective from the list.
- Press Enter or click Apply.
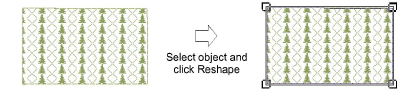
- Click the Reshape icon. A guide frame appears around the object.
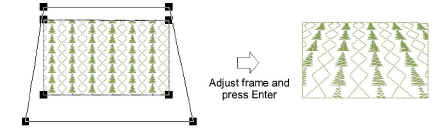
- Adjust the frame to move the guidelines closer together or further apart.
- Press Enter or click Apply.
Note
The guide frame must not cross the outer boundary of the shape, and cannot be inside the shape.