Adjust entry/exit points
 | Use Reshape Object to adjust the entry and exit points of selected objects. |
|---|---|
 | Use Reshape Views > Show Entry/Exit Points to toggle entry/exit point display when using the Reshape Object tool. |
EmbroideryStudio allows you to manually change entry and exit points of individual objects. Entry and exit points should always be checked if you are re-sequencing objects in a design.
TIP
Closest joins are not automatically maintained when objects are moved, re-sequenced, or edited. The Apply Closest Join feature allows you to automatically re-apply closest joins to objects after editing.
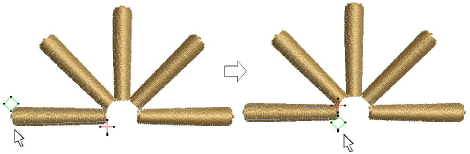
To adjust entry/exit points...
- Select an object and click Reshape Object.
- Click Show Entry/Exit to view only entry and exit points.
- To view next or previous objects, press Tab or Shift+Tab keys. Any changes to objects are confirmed.
- Select entry or exit points of adjoining objects and drag into close proximity.

- Press Enter.
TIP
If you are digitizing adjoining columns, optionally keep or omit the last stitch in the first column to achieve a smoother join or shorter connecting stitches.