Add stamps to a library
 | Use Docker > Carving Stamp to define a pattern of needle penetrations using a ‘carving stamp’ as a template. |
|---|
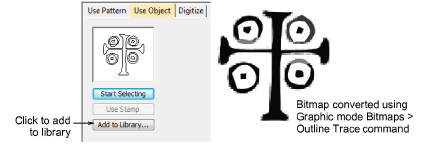
This procedure starts when you click the enabled Add to Library button either on the Use Object tab or Digitize tab in the Carving Stamp docker.
TIP
The Carving Stamp feature can only use vector or embroidery objects as a basis for stamps. If you want to use a bitmap image, you can convert to vector format in CorelDRAW Graphics using the Bitmaps > Outline Trace command set.
To add a stamp to a library...
- Select an object which you want to add to the library as a custom stamp.
- Digitize carving stamps on the spot using the Carving Stamp > Digitize tab.
- Define carving stamps using the Carving Stamp > Use Object tab.
- On either of these tabs, click the enabled Add to Library button. The Create Split Pattern dialog opens.
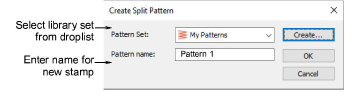
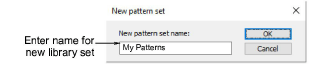
- Select a set from the droplist or click the Create button to create a new library.
If you chose to create a new library set, use the New Pattern Set dialog to create a new stamp set. The newly created stamp set is displayed in the Set list when the Use Pattern tab is selected.
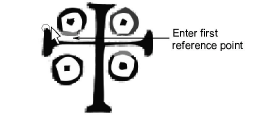
Enter a new stamp name and click OK. You are prompted to digitize the first reference point in the design window.
Enter the first reference point:
- Press Enter to have the reference point created automatically.
- Move the mouse pointer to the position you want to use as the anchor point during manual stamp placement, and left-click.
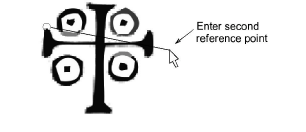
- Enter the second reference point:
- Press Enter to have the reference point created automatically.
- Move the mouse pointer to the position you want to use as the guide point during manual stamp placement and left-click.
- Click OK. The newly created stamp is displayed in the stamp list when the Use Pattern tab is selected.
Note
The Rename and Delete buttons are enabled in the Use Patterns tab whenever a custom stamp is selected.