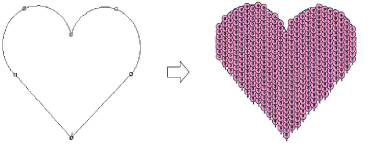
Digitize sequin fills
 | Use Sequin > Sequin Fill to digitize and fill large, irregular shapes with sequins. |
|---|
Before you can use the Sequin tools, you need to choose a suitable machine format. Similarly, you need to prepare a palette of sequins according to capabilities of your chosen machine. See Selecting sequin mode for details.
Once set up, the palette is available for use from the Sequin toolbar and Object Properties. Digitizing sequin-fill objects is essentially the same as digitizing complex fill objects.
Double-clicking the object will invoke Object Properties similar to sequin run properties. See Digitizing sequin runs for details.
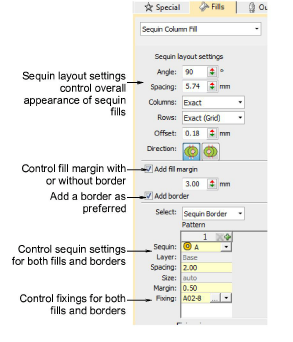
Controls available on the Fills > Sequin Column Fill tab for patterns and fixing stitches are summarized below.
| Control | Description |
|---|---|
| Sequin layout settings | Use these settings to control the overall layout of the fill grid, including angle, sequin spacings, and offsets within the grid. See Adjust sequin layouts for details. |
| Fill margin | Include a fill margin or not as required. No sequin will have its center placed outside the fill margin. Usually used with a border but not necessarily. See Adjust sequin layouts for details. |
| Add border | Sequin fills can include a border, with or without a margin. The border is a property of the object. See Fancy sequin fills for details. |
| Select | Determines what patterns are displayed: Sequin Fill: displays the fill pattern Sequin Run: displays the border pattern. All other controls work the same as for Sequin Run. |
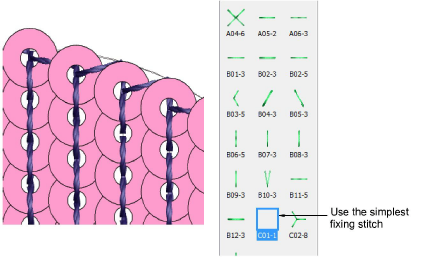
Fixing stitches are selected in the same way as for sequin runs. For sequin fills, we recommend the simplest fixing stitch available – C01-1.