Apply curved lines to multiple objects
 | Use Outline > Digitize Run to place a row of single or triple run stitches along a digitized line. |
|---|---|
 | Use Stitch Effects > Florentine Effect to apply curve stitching to existing objects. |
 | Use Stitch Effects > Liquid Effect to apply curve stitching to existing objects. |
You can apply Florentine Effect or Liquid Effect to multiple objects in a design. All objects share the same curved line.
To apply a curved line to multiple objects...
- Using the Digitize Run tool, digitize a guideline for the curve to follow. Digitize a second line if you want to apply Liquid Effect.
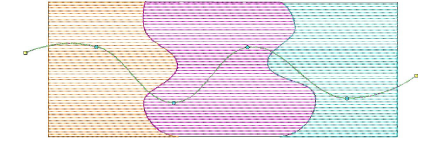
- With the guideline selected, select Object > Use for Florentine Effect. This tags the digitized run as the default curve line.
TIP
With two guidelines selected, the Object > Use for Liquid Effect command becomes available.
- Select an object and click the Florentine Effect icon. Notice that the turning stitches follow the guideline.
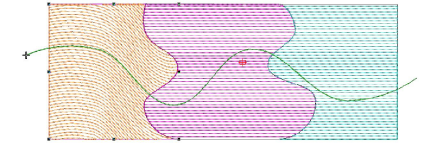
- Apply to the other objects in the same way. Notice that the turning stitches again follow the original guideline.
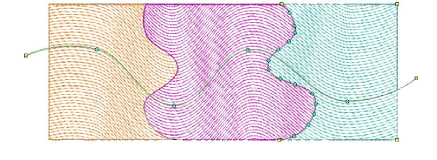
- Press Esc to complete. Optionally, delete the original run object if not required as part of the design.
TIP
Turn on TrueView™ or use the Show Needle Points tool to view the results.